

Spring Cleaning in the Unpacked TERA Executable
Spring Cleaning in the Unpacked TERA Executable
Correcting the remaining data directories and trimming Themida fat.

Continuing on from the last article, it’s time to thoroughly clean up the PE headers and trim as much binary bloat caused by Themida as possible, hopefully netting us a decent improvement in executable file size.
The original, packed TERA.exe is ~22 MB, while the unpacked version is ~64 MB. For context, the unprotected TERA.exe from the Korean build is ~52 MB, so that’s where we’d like to get to.
Correcting Data Directories
Let’s once again take a look at the data directories in PE Tools:
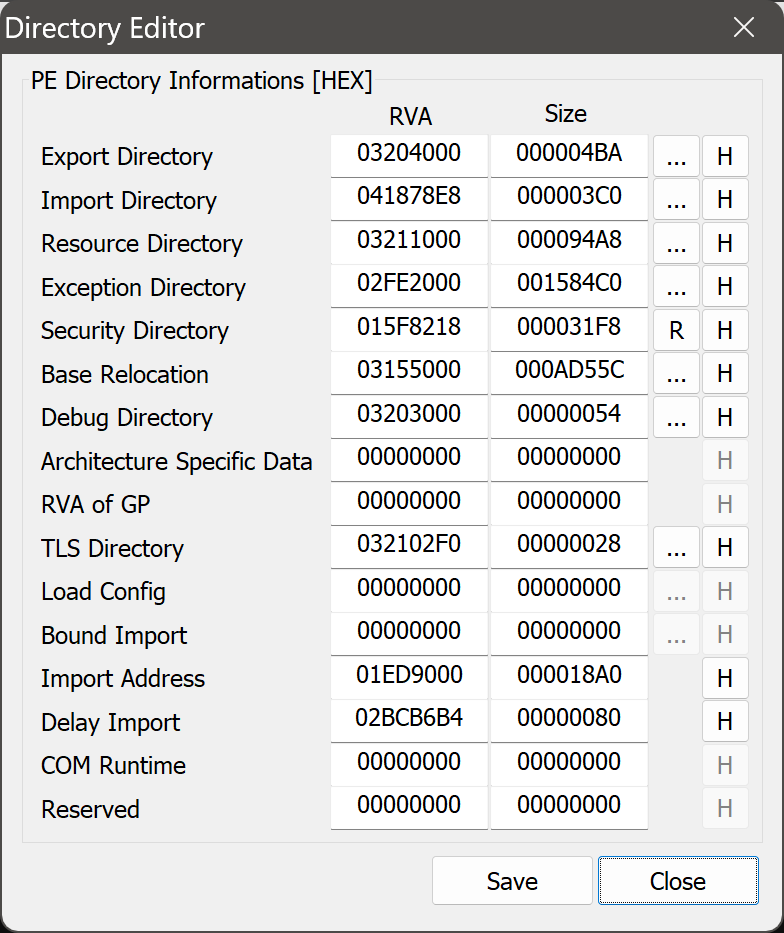
Going through each of these RVAs in Binary Ninja, we can quickly determine the following:
Export directory: This points into the
!exportssection. This is a candidate for correction.Import directory: This points into the
.SCYsection. This is fine, though we’ll rename that section later.Resource directory: This points into the
!rsrcsection. This is a candidate for correction.Exception directory: We fixed this earlier.
Security directory: Note that this is a file offset rather than an RVA. Even so, the offset points to nonsense. We’ll get to this later.
Base relocation directory: We fixed this earlier.
Debug directory: This points into the
!debugsection. This is a candidate for correction.Architecture directory: This is missing as it should be since it’s a reserved directory.
Global pointer directory: This is missing as it should be since x86 does not have a
$gpregister like e.g. MIPS.TLS directory: This points into the
!tlssection. This is a candidate for correction.Load configuration directory: This is missing but shouldn’t be. Most executables have this directory nowadays.
Bound import directory: This is missing. This isn’t actually a problem, and it’s quite likely that the original PE didn’t have it either.
IAT directory: We fixed this earlier.
Delay import directory: This points into the
.rdatasection. This is fine.COM descriptor directory: This is missing as it should be since TERA isn’t a .NET application.
Reserved directory: This is missing as it should be since it’s a reserved directory.
In summary, we are only interested in the export, resource, security, debug, TLS, and load configuration directories.
Next, let’s take a look at the data directories in the unprotected TERA.exe from the Korean build:

Taking a look in Binary Ninja again, we can determine the following about the data directories that we’re interested in:
Export directory: This points into the
.rdatasection.Resource directory: This points into the
.rsrcsection.Security directory: This is missing. This isn’t surprising, but again, we’ll get to this later.
Debug directory: This points into the
.rdatasection.TLS directory: This points into the
.rdatasection.Load configuration directory: This points into the
.rdatasection.
Armed with this knowledge, we can start looking for the data directories.
Correcting Exports
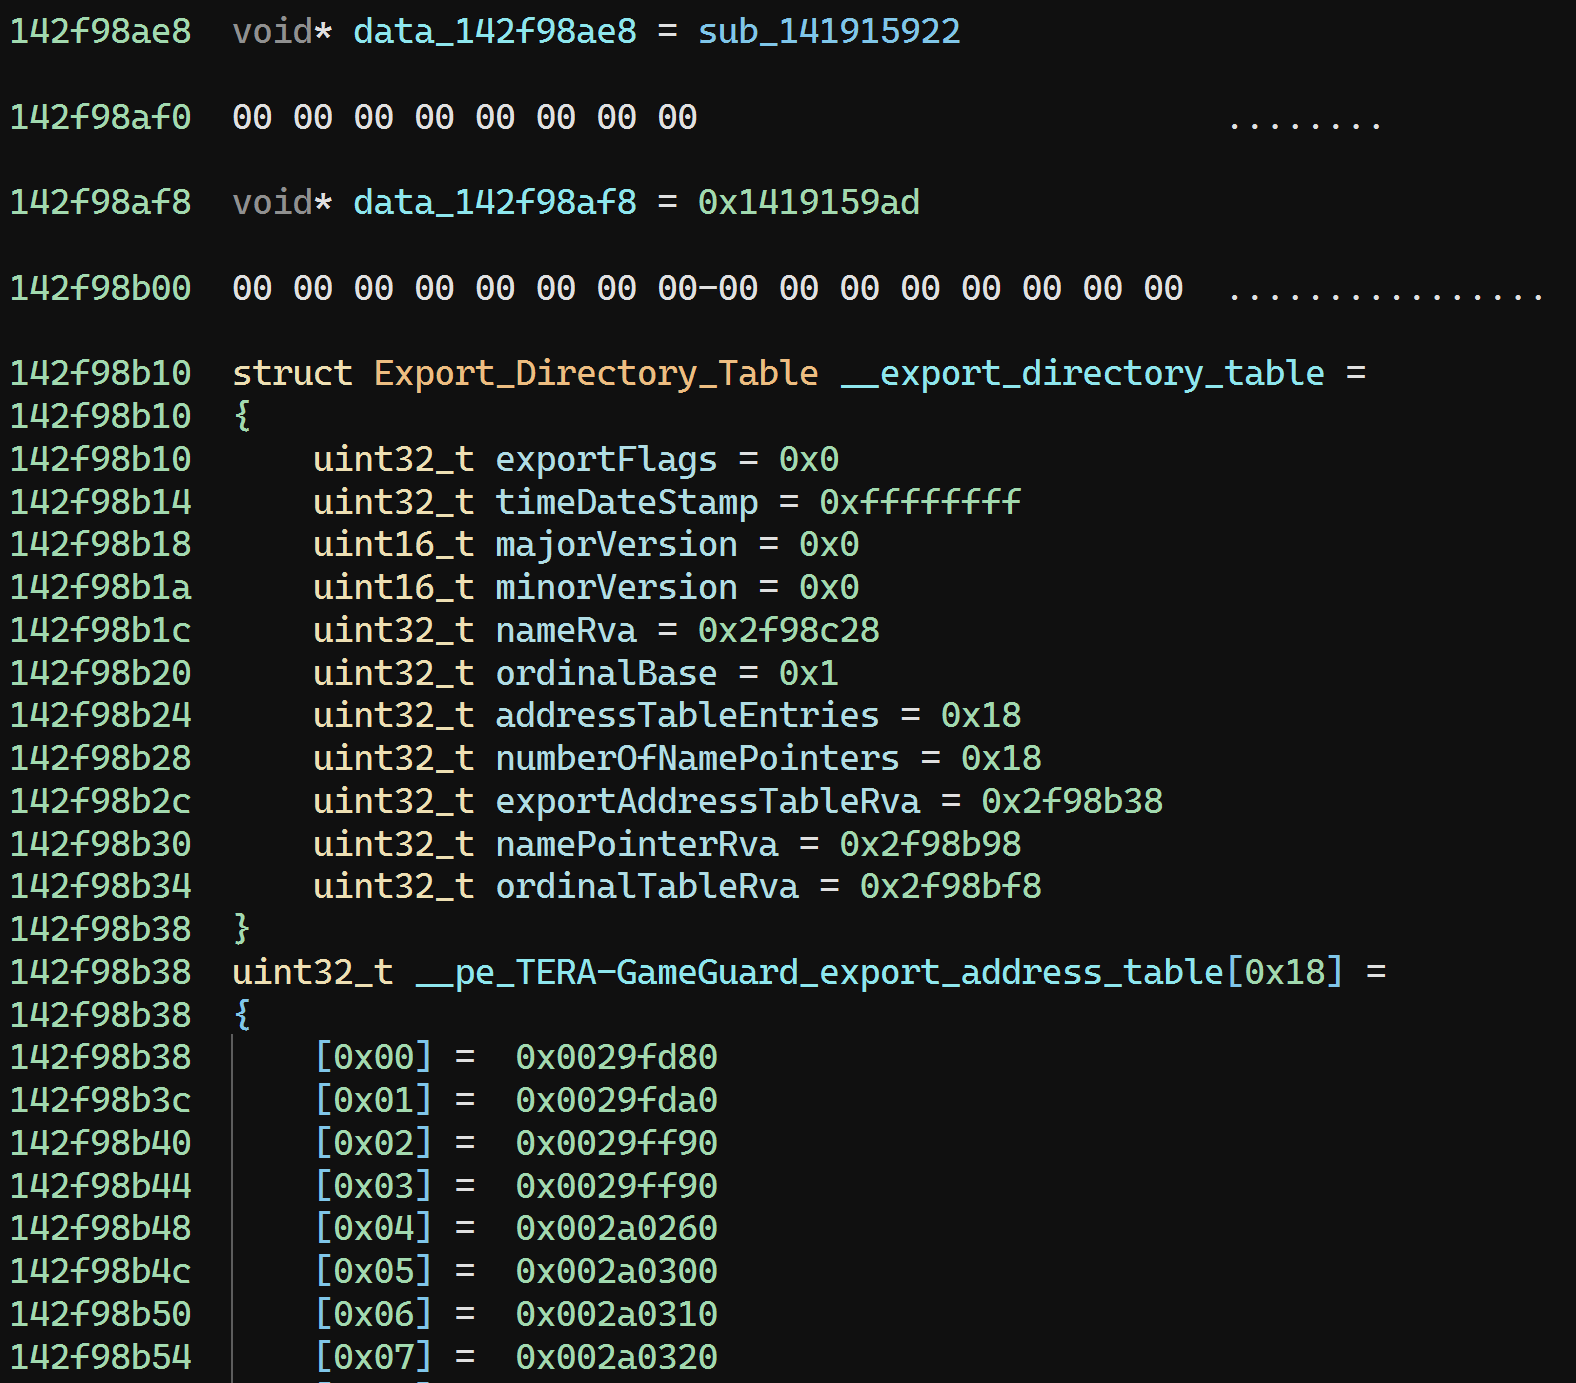
Let’s jump to the beginning and end of the export directory in the Korean build:
Since the import directory starts immediately after the last export name, calculating the size of the directory is easy.
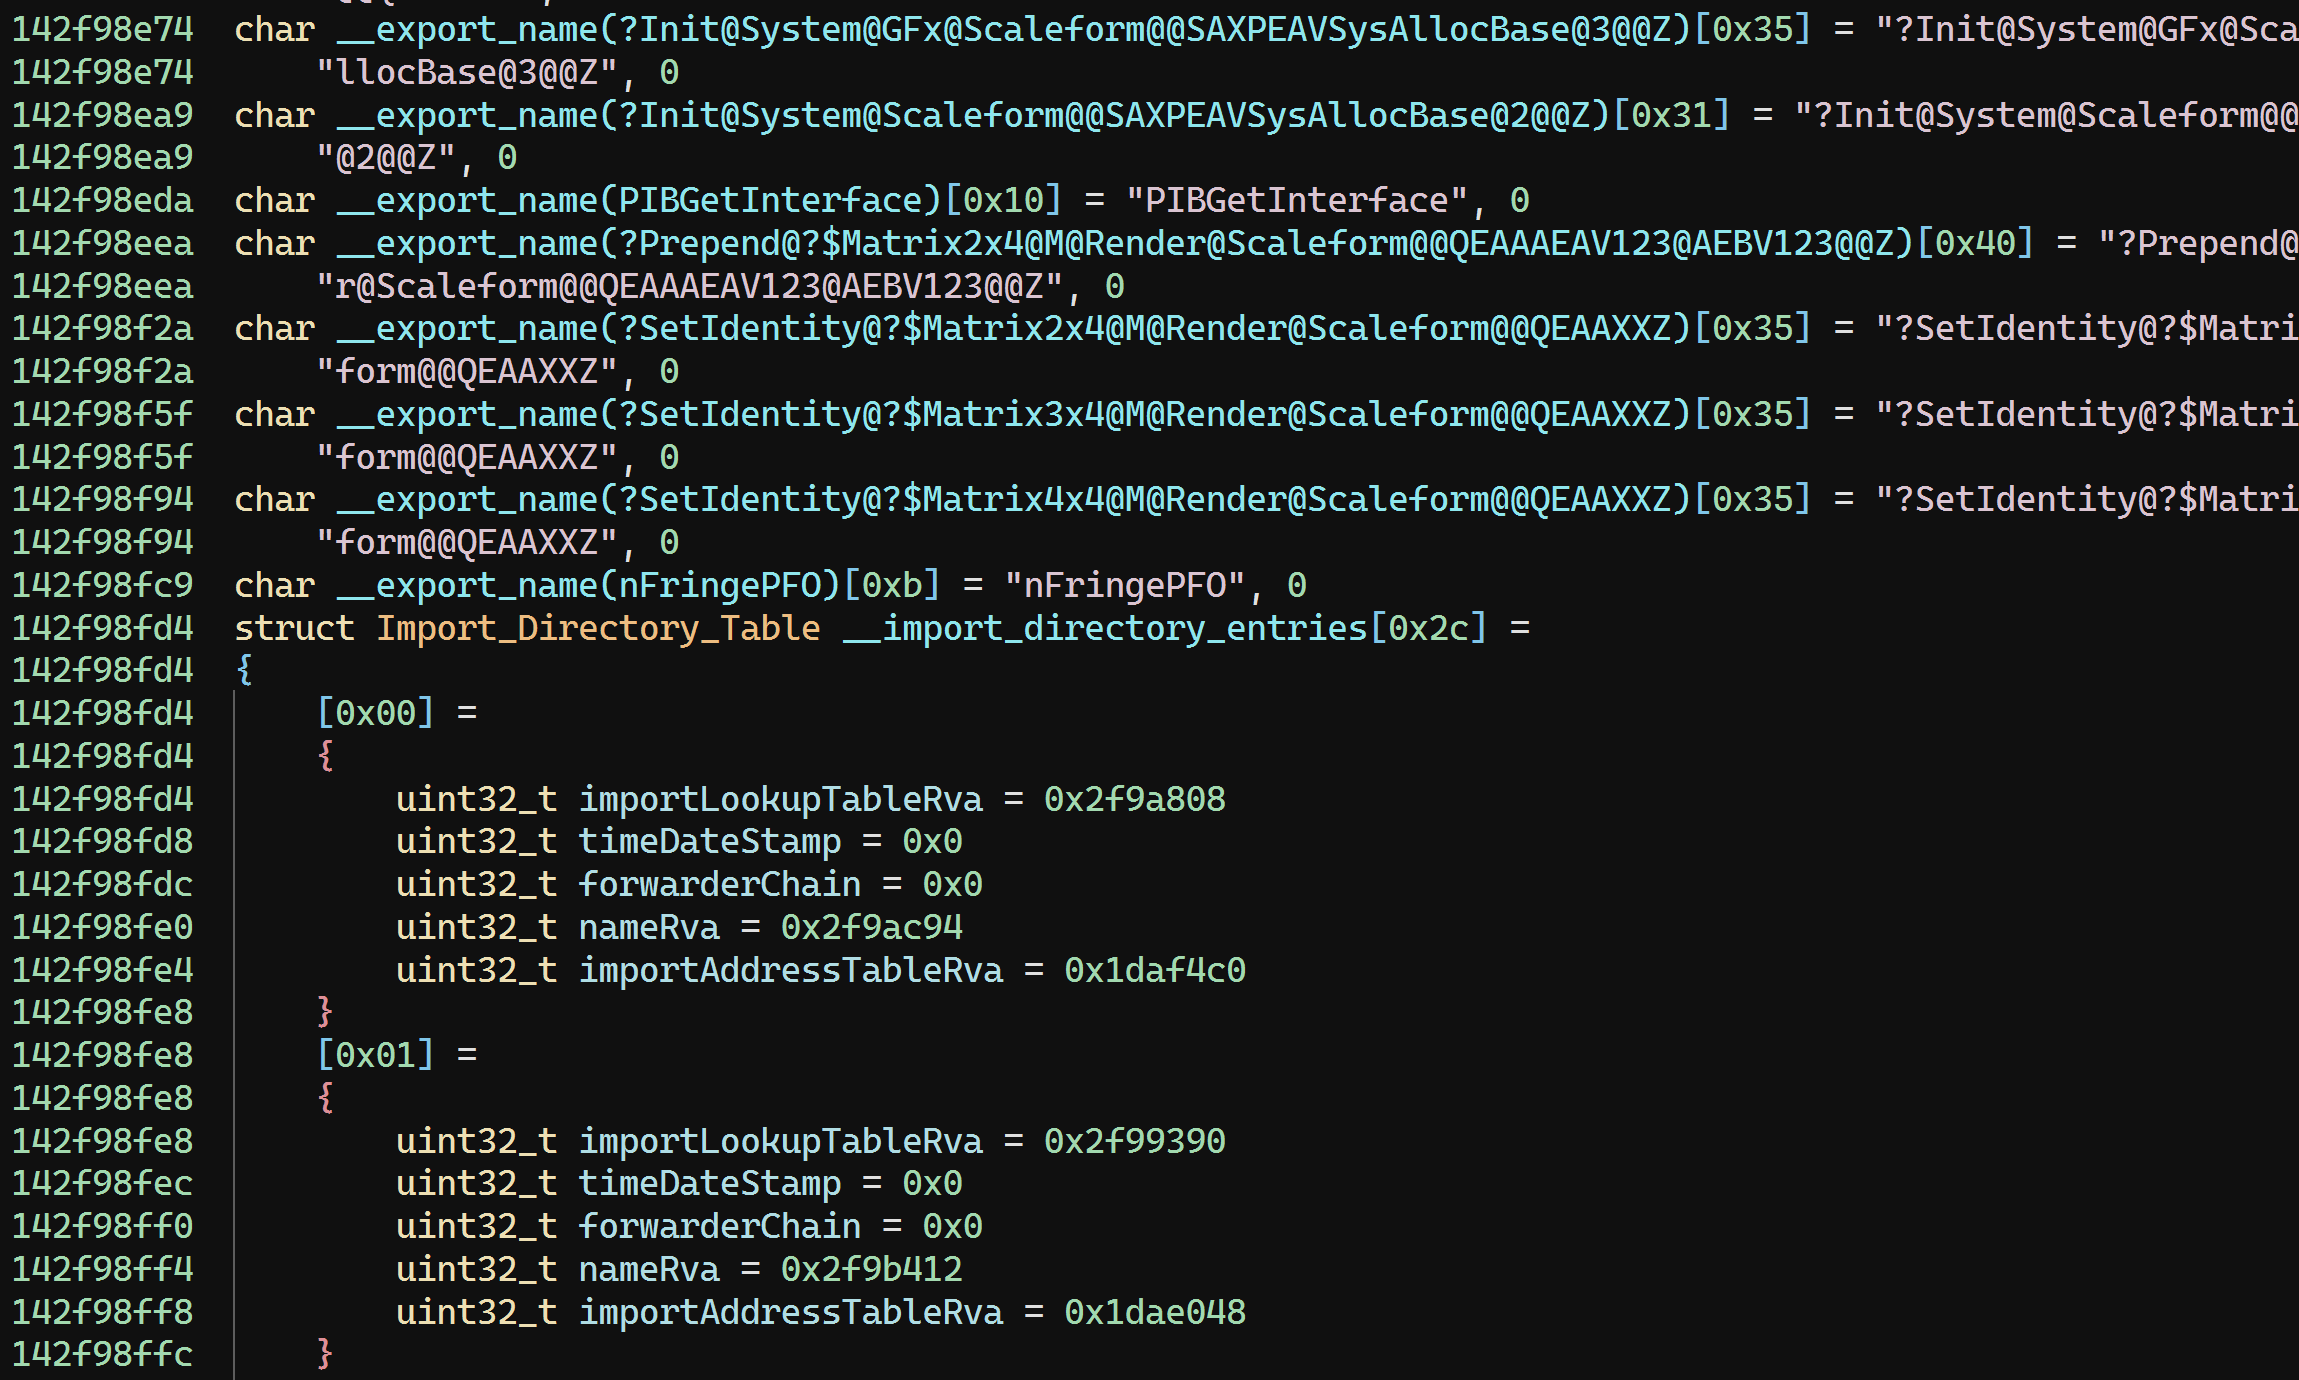
We’ll also search for the string nFringePFO to find the end of the export directory:
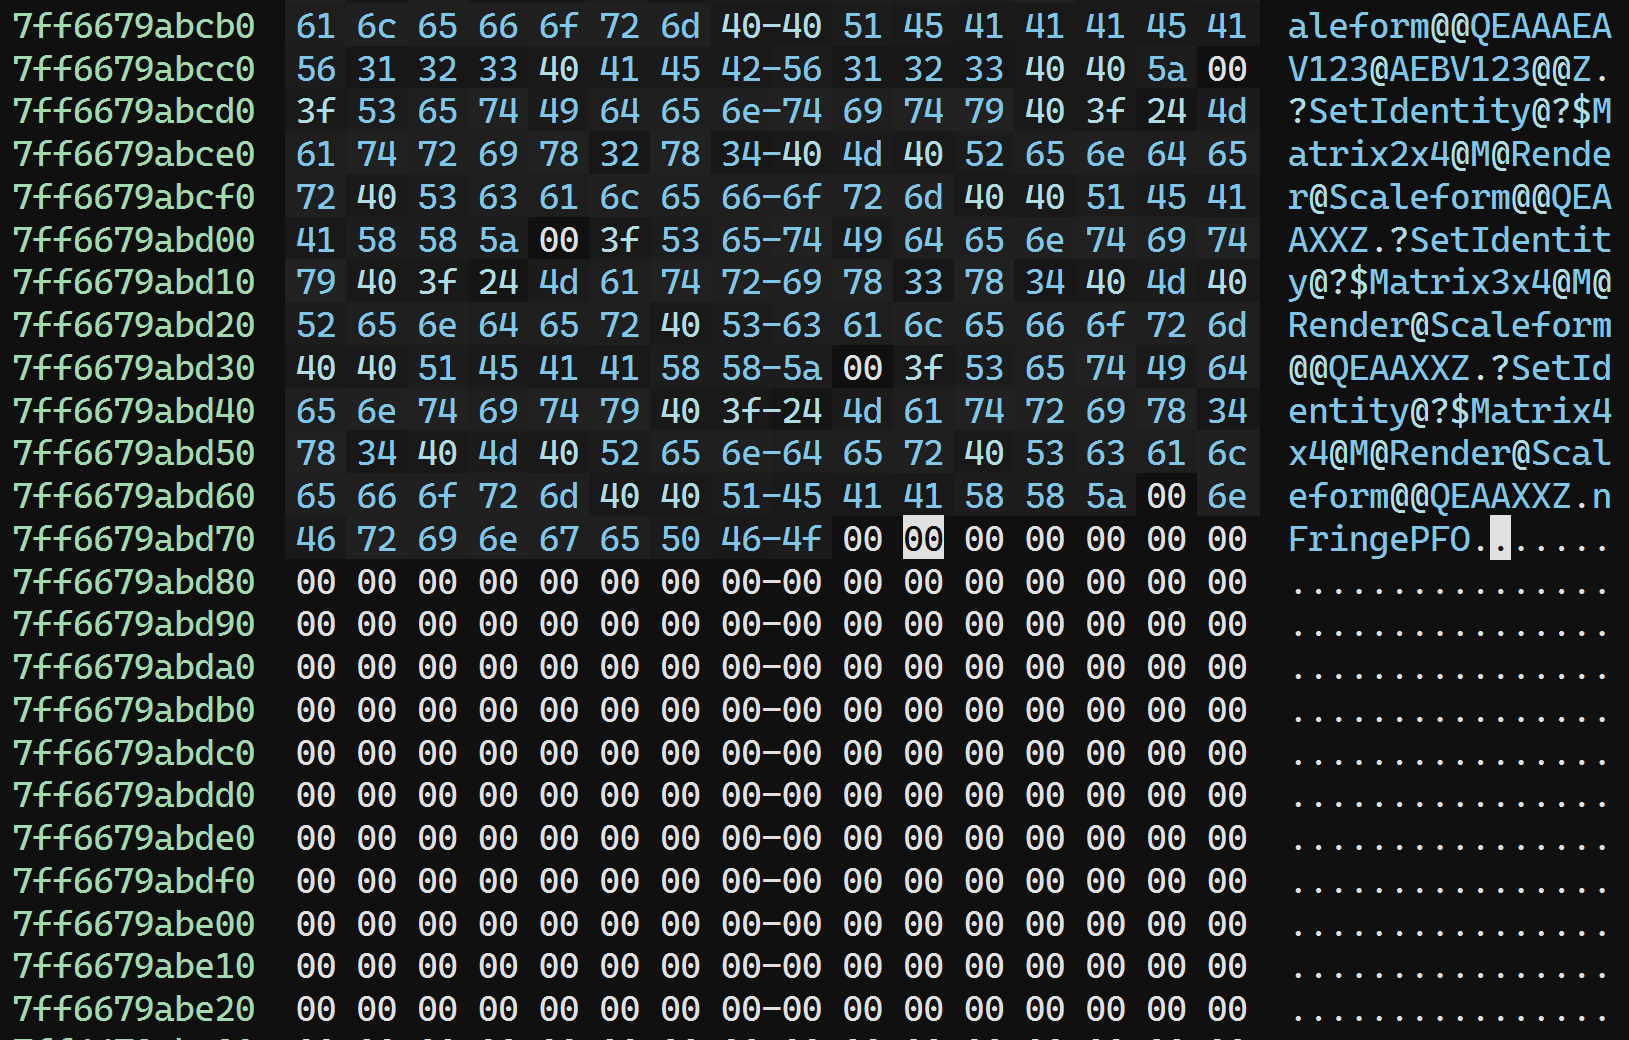
Scrolling up, we can fairly easily spot the beginning of the export directory:

So, our export directory RVA is 0x2bcb8c0, and the size is: 0x7ff6679abd7a - 0x7ff6679ab8c0 = 0x4ba.
Correcting Resources
This one is fairly easy since we know that resources are in the .rsrc section:
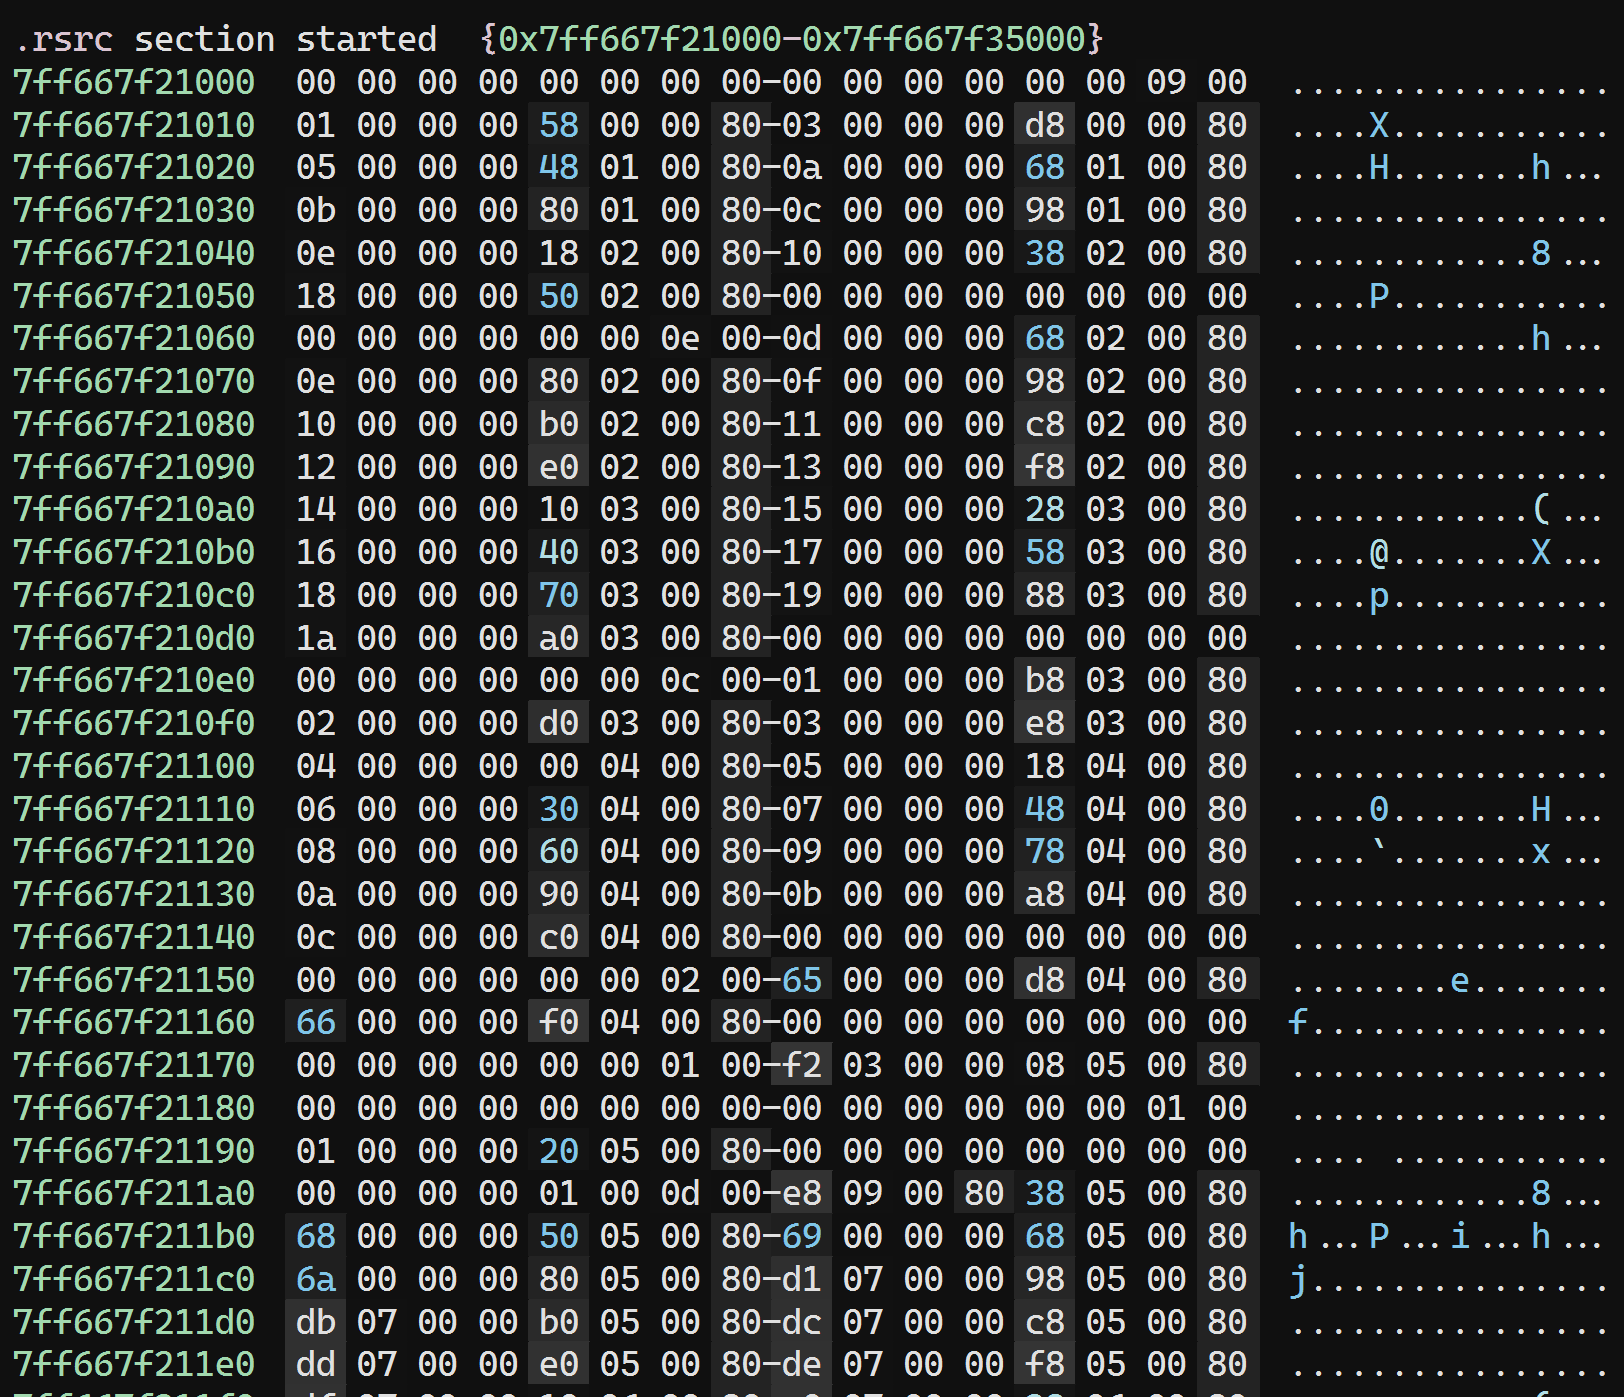
Our RVA is 0x3141000.
Jumping to the end of the section, we see this:

Instead of manually parsing the (somewhat complex) structure of the resource directory, we can just look at the Korean build to see where the end is:
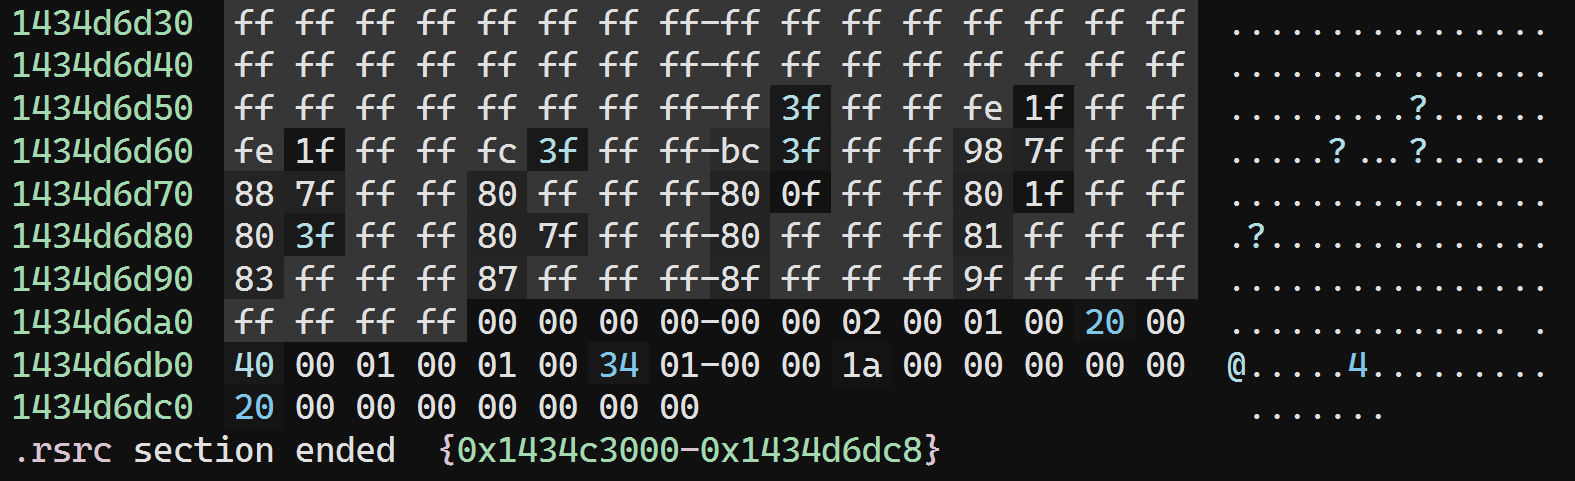
So the size is: 0x7ff667f34e20 - 0x7ff667f21000 = 0x13e20.
Bogus Attribute Certificate
As mentioned above, the security directory points to a nonsensical file offset. There’s nothing even remotely resembling a certificate at 0x15f8218, whether interpreted as an RVA or a file offset:


But remember: This file offset comes from the packed executable. It’s liable to be invalid in an unpacked one!
Sure enough, if we open up the packed executable as a pure binary file and jump to 0x15f8218, we see:
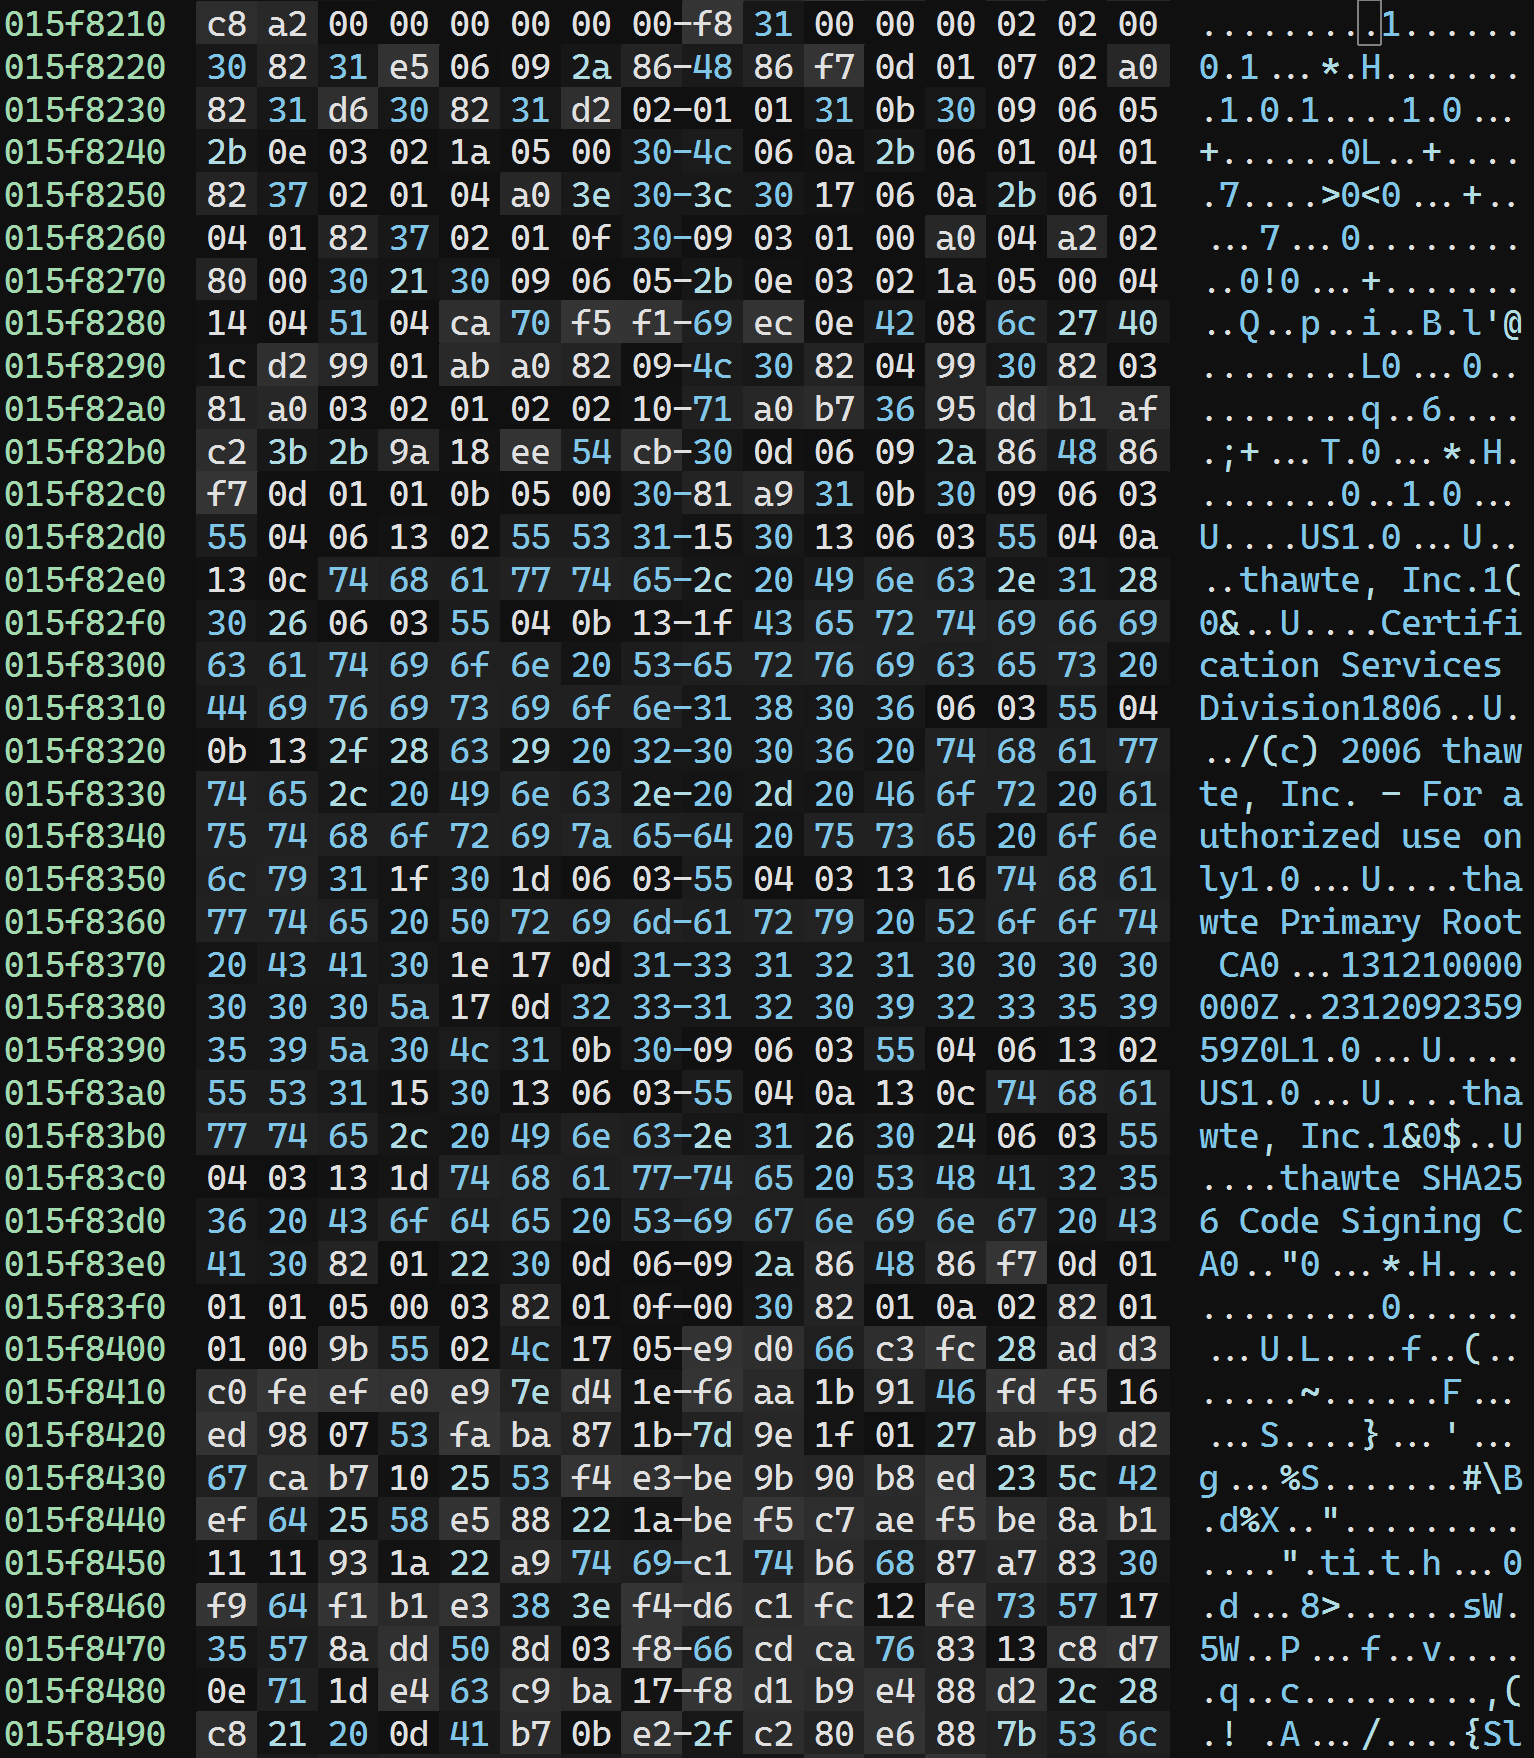
That certainly looks like a certificate.
So what can we do? Well, not much, other than get rid of the security directory. The packed executable was signed with this certificate, but even if we did fix the unpacked executable to point to it, it would be meaningless; after all, the contents of the unpacked executable look nothing like the packed one. It would obviously fail verification. So pointing to the now-bogus certificate would probably do more harm than having no certificate, as it would immediately make the executable suspicious.
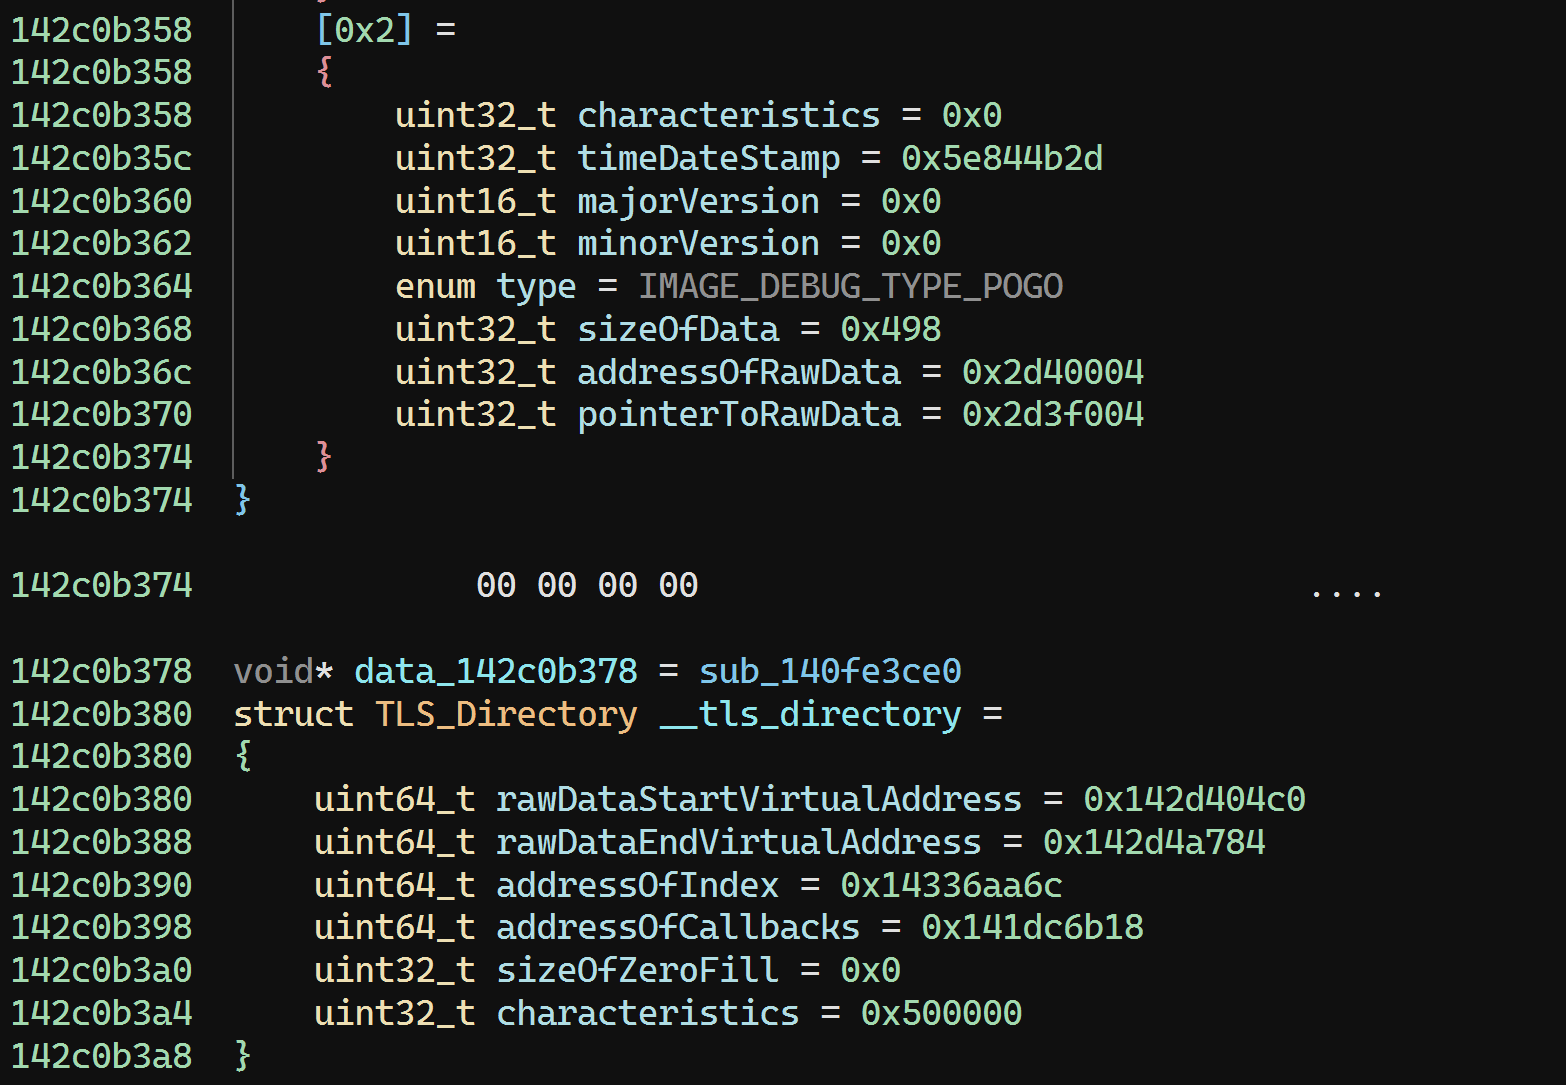
The Remaining Directories
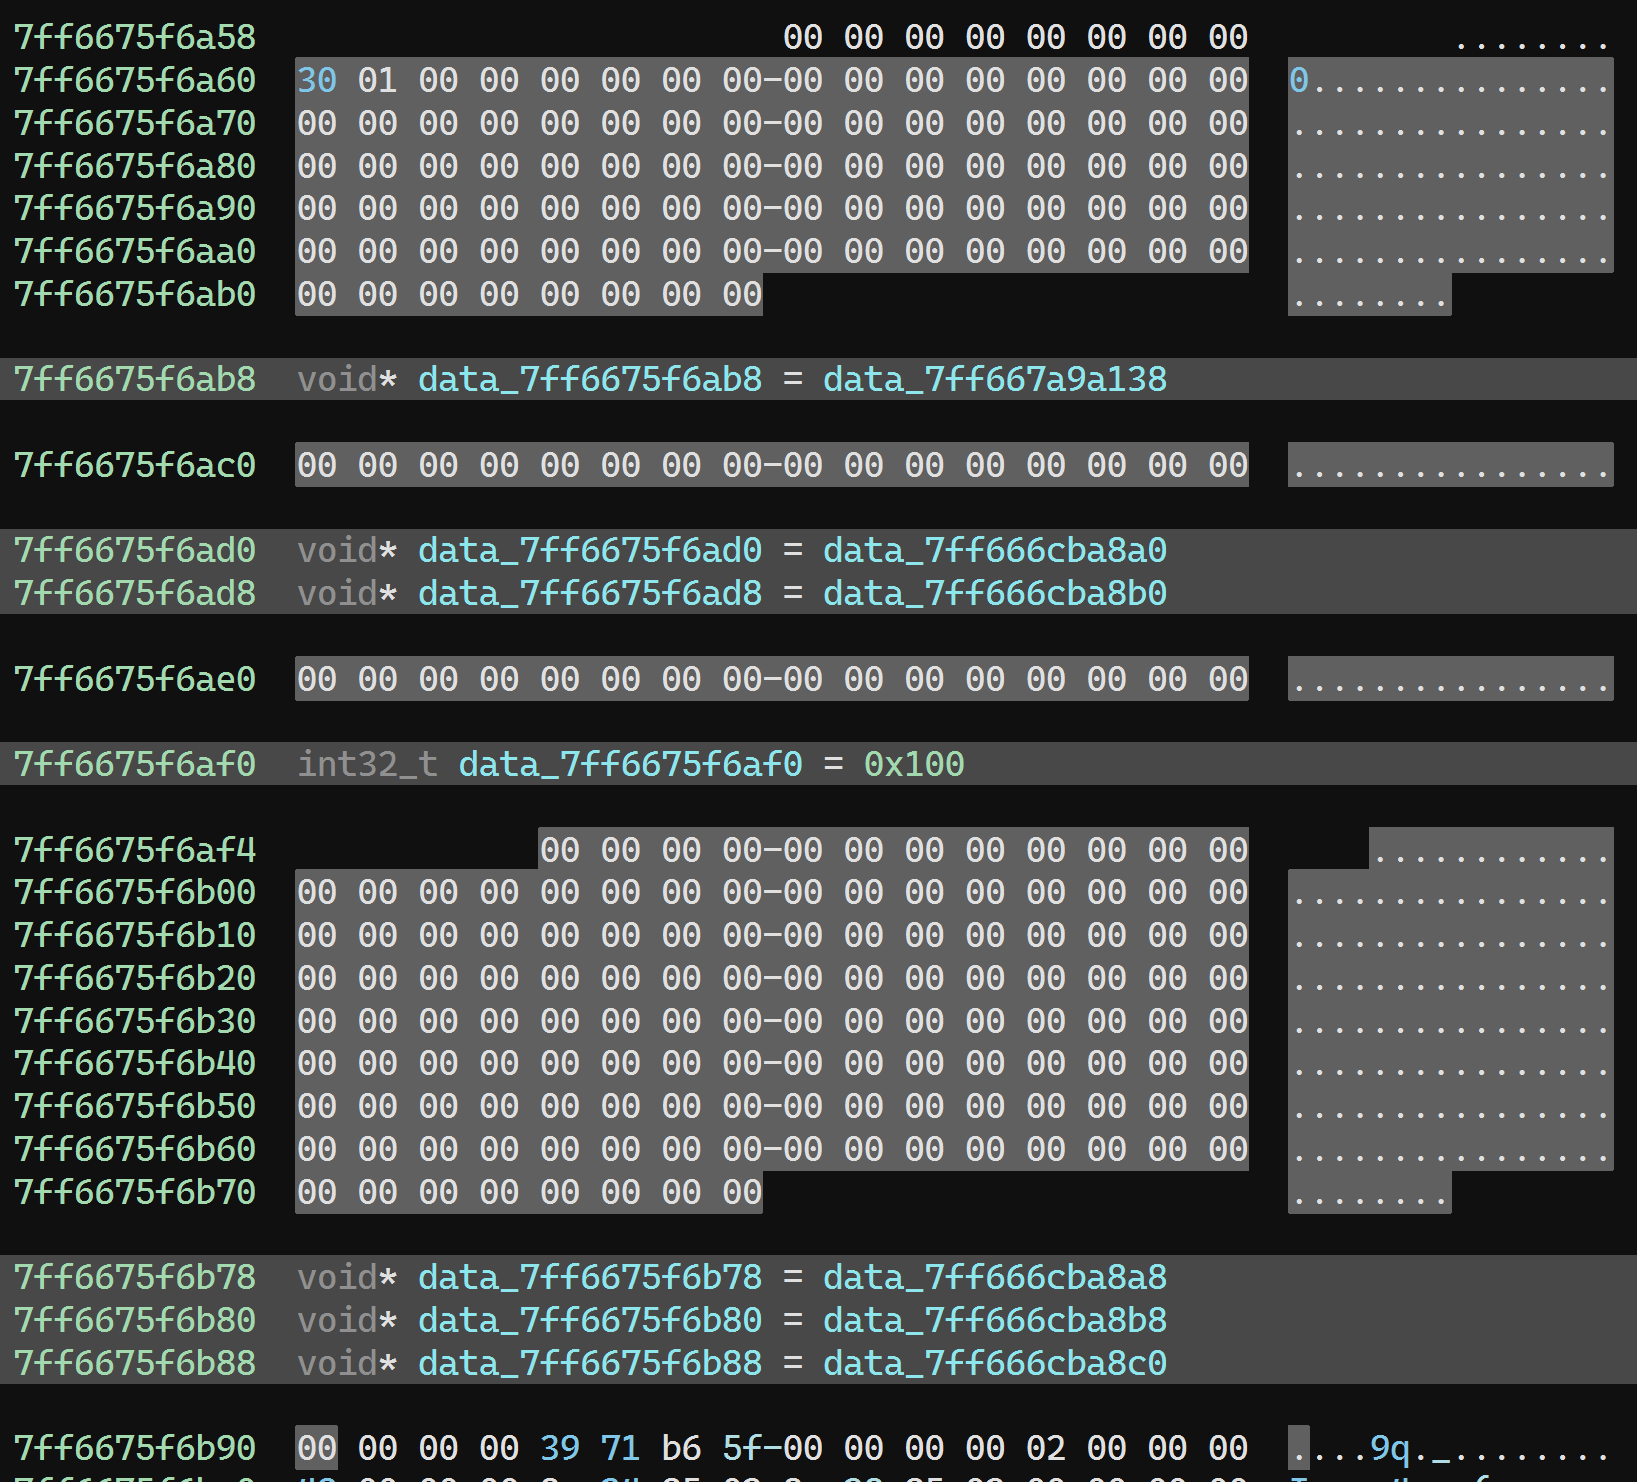
We now need to find the debug, TLS, and load configuration directories. If we look at the Korean build, we can see that these all sit right next to each other in .rdata:

We could locate these with some careful pattern search logic, but since we have the Korean build, let’s just save some time. Scrolling up a bit, there’s a string:

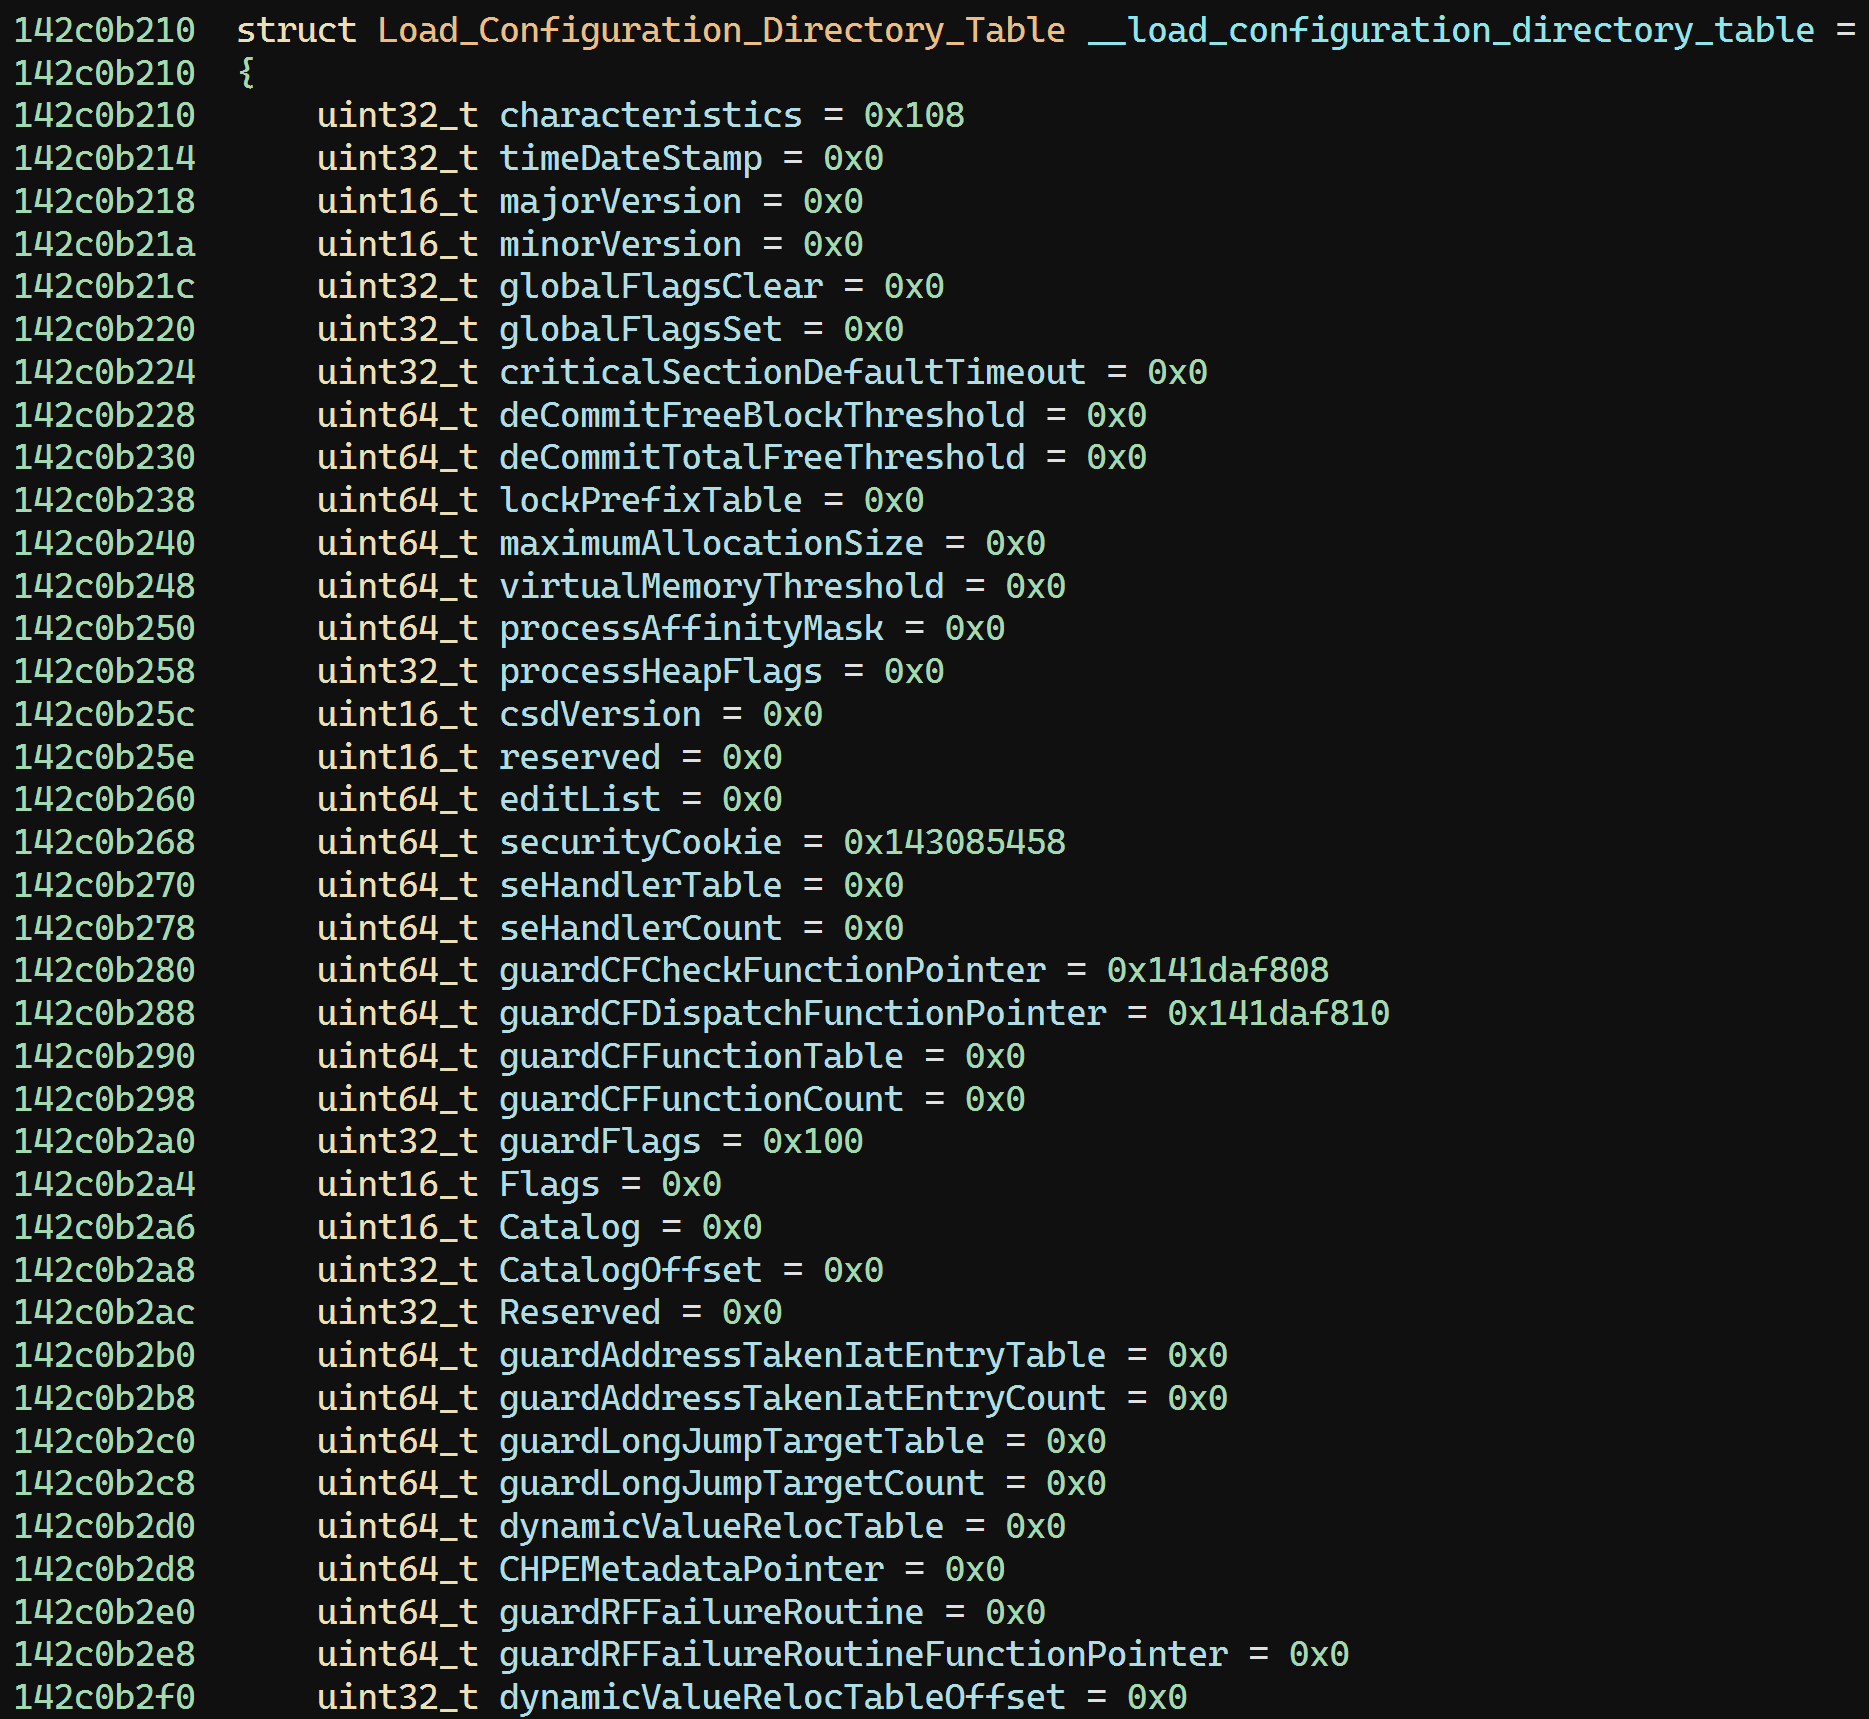
Finding that string and scrolling down a bit, we find the load configuration directory:
The screenshot from the Korean build above is actually misleading; the first member of the structure contains its size. (Incidentally, all Microsoft documentation gets this wrong too!) So the load configuration directory begins at RVA 0x2816a60 and has a size of 0x130.
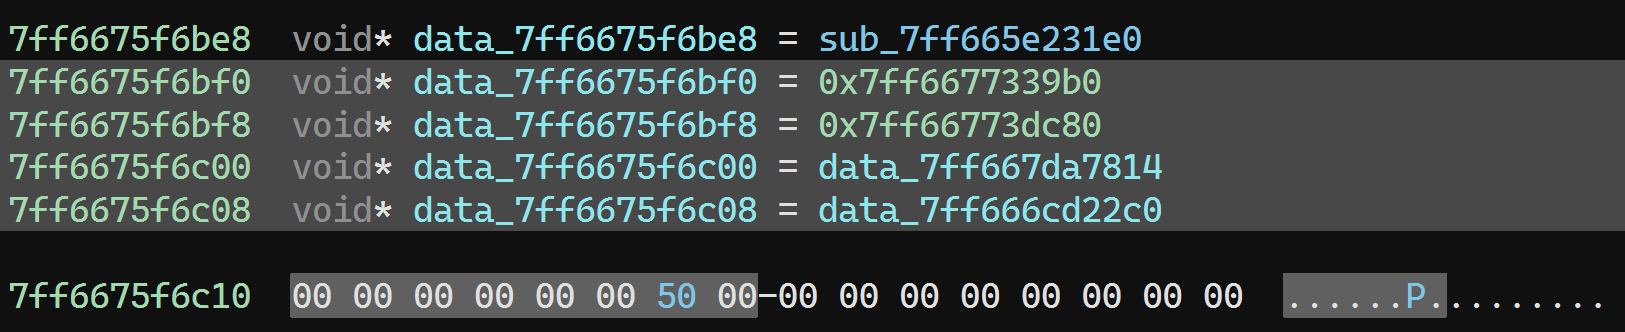
Scrolling down, we find the debug directory:

This one is easy to infer by comparing to the Korean build. The RVA is 0x2816b90 and the size is: 0x7ff6675f6be4 - 0x7ff6675f6b90 = 0x54.
Finally, we have the TLS directory, which is also easy to spot:
The RVA for this is 0x2816bf0 and the size is: 0x7ff6675f6c18 - 0x7ff6675f6bf0 = 0x28.
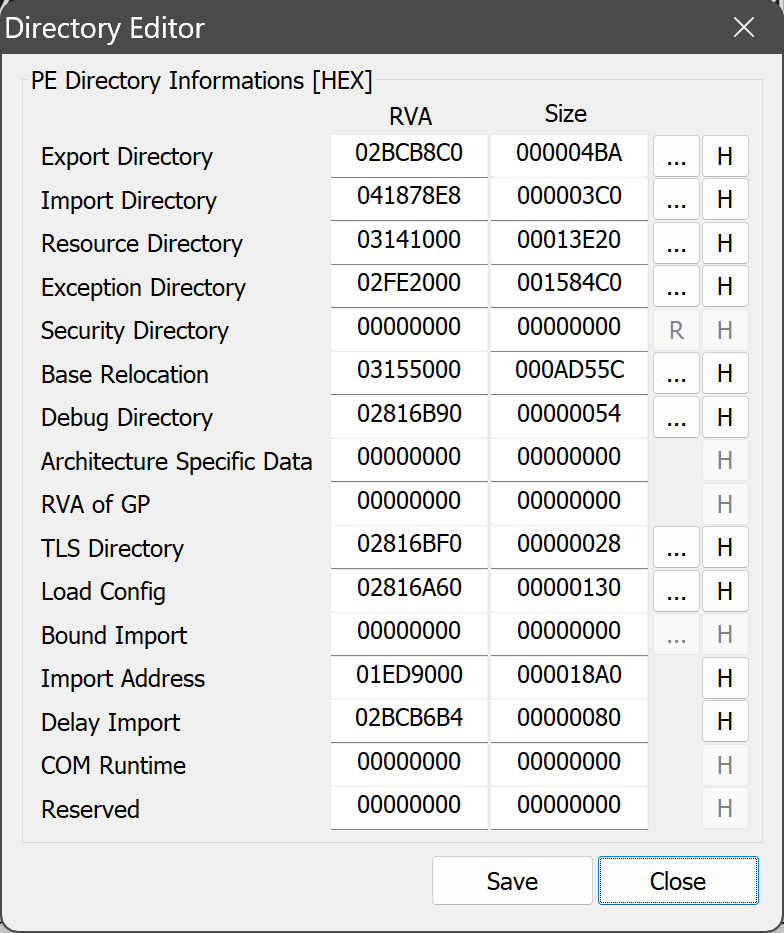
That should be all data directories corrected:
Now we can go ahead and save the changes.
Pruning Dead Sections
For this next part, we’re going to use CFF Explorer as PE Tools seems to have some bugs related to section removal.
Let’s take a look at the section headers:

First, we go ahead and rename .SCY to .idata, the more conventional name for a section containing the import directory.
Next, we can safely delete the headers and data for the !debug, !exports, !imports, !tls, !rsrc, and !reloc sections. All of our efforts so far have rendered these sections pointless as we’re now using the corresponding original data directories and sections.
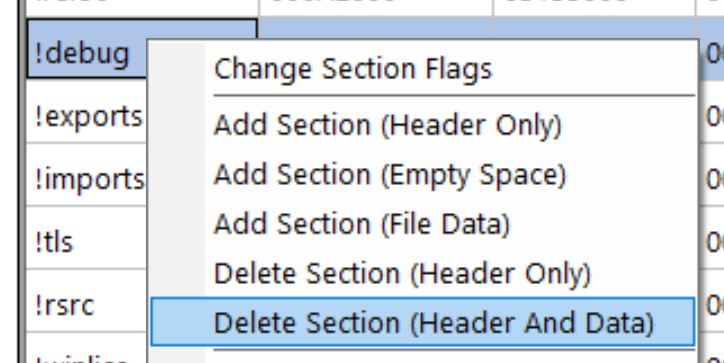
The !boot section can also safely be deleted. This section contains the code used to unpack the original executable in memory. This is obviously no longer relevant as we’ve successfully unpacked and repaired it.
We’ll rename the !winlice section to .winlice to indicate that it is actually used; the virtualized code in TERA.exe will still call into code in this section. For now, there is no easy way to get rid of this.
Once done, we’ll rebuild the image size and PE headers just for good measure:
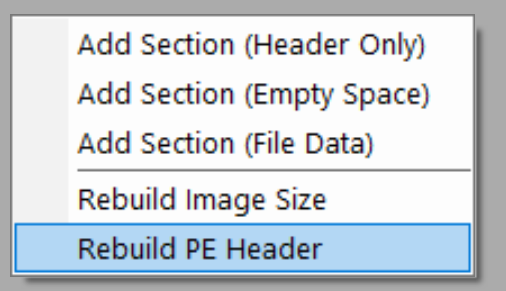
Finally, we can go ahead and save.
Finishing Touches
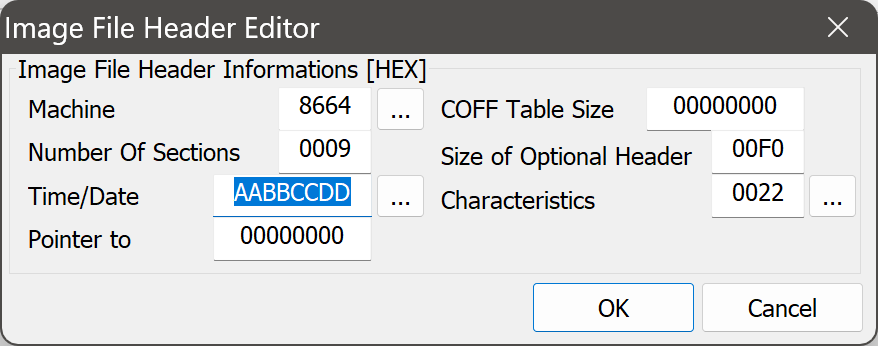
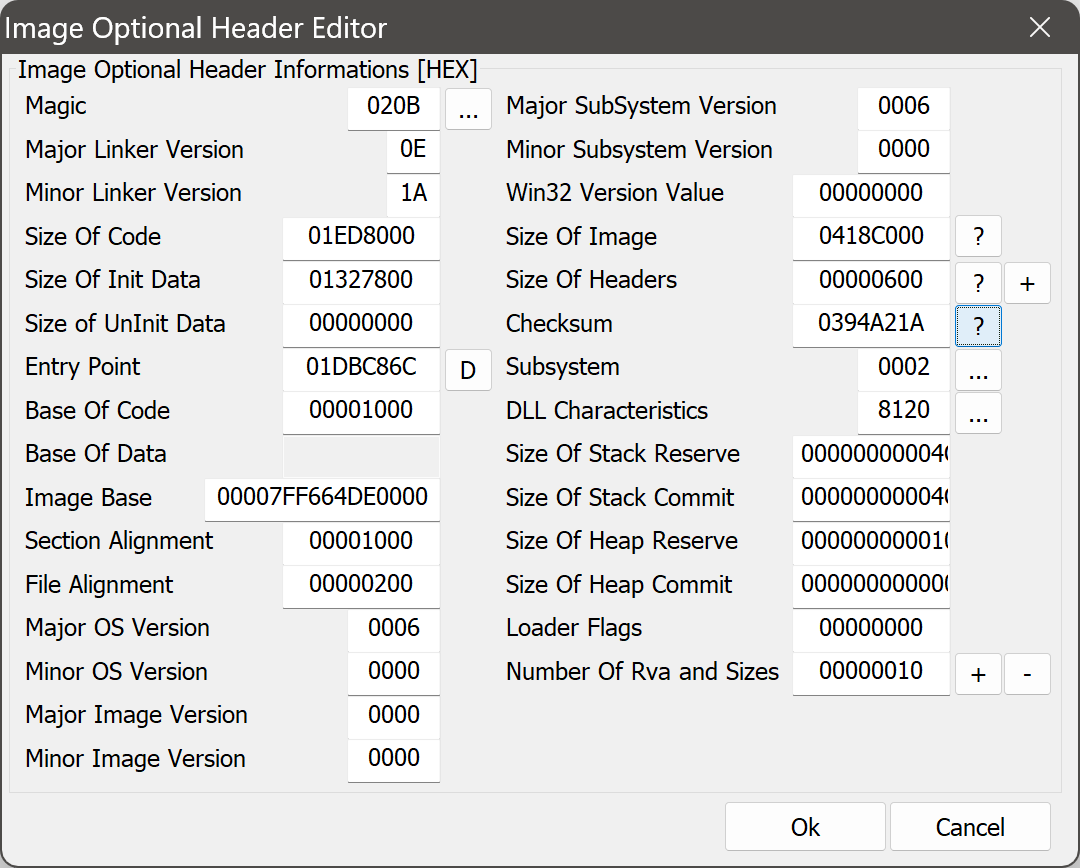
Just for good order, we’re going to edit a couple of relatively minor fields in the PE headers. We’ll use PE Tools again for this.
We’ll change the timestamp in the file header to an arbitrary deterministic value:
And we’ll make sure the checksum in the optional header is correct:
That’s it for our changes!
We will be doing more debugging in IDA and patching in Binary Ninja for the next article, so be sure to synchronize your changes there.
Conclusion
We’ve now gotten TERA.exe down to ~58 MB. Not quite 52 MB, but any more than that will require getting rid of all virtualized code. That’s a (difficult) exercise for another day.
In the next article, I’ll explain how to neutralize various Themida-based anti-tampering mechanisms embedded in the TERA executable to fully unlock the executable for third-party modding.